Whether you’re hosting a fun summer get-together and need an easy way to decorate your party table or are just looking for a unique way to decorate your home this summer, you’re going to love this easy DIY Homemade Flower Vase craft! With this quick project, you can transform plain tin cans into a pretty flower centerpiece perfect for summer. And all you need are a few simple supplies to put this patriotic centerpiece together.

Easy DIY Homemade Flower Vase
You know how much I love to work on crafts and projects. This makes a lovely floral decoration for summer holidays. It’s perfect for Memorial Day, 4th of July, Labor Day, and even Veteren’s Day.
Not only are these flower arrangements adorable to sit on your dining table, but they are lovely gifts too. DIY projects make fabulous gifts because whoever you give them to knows you think they are pretty special.
Supplies for a Painted Can Centerpiece
One of the best parts about this easy craft is that you only need a handful of craft supplies to make it! To make your own painted can centerpiece, you’ll need:
- Empty tin cans with the labels removed
- Red, white, and blue paint
- Masking tape
- Star stickers
- Twine
- Artificial Flowers or Fresh Flowers
That’s it! With these simple supplies you can transform your leftover tin cans into a rustic vase for your summer flowers.
Some of the links in this post are affiliate links. This means if you click on the link and purchase the item, I will receive an affiliate commission at no extra cost to you. All opinions remain my own.

What Kind of Cans Can I Use?
The beauty of this project is that you can create it using a variety of materials! It doesn’t matter what type of cans you use to create your vases, just add your own unique flair. As you’re cooking dinner, consider saving these cans to create your own patriotic centerpiece:
- Soup cans
- Vegetable cans
- Cans with beans
- Coffee cans
- Fruit cans
- Sauce cans
What Type of Paint Is Best for Cans?
Since cans are made of metal, not all paint will work. Traditional latex paint or acrylic craft paint isn’t a good option for painting directly on the can because it won’t stick to the metal. To paint your tin cans, you have two paint options:
Either type of paint you choose will help provide a solid base for you to decorate your tin cans. While spray paint is good if you’re looking for a shiny finish, for this rustic tin can project I found that chalk paint is a better option.
Chalk paint provides you with a matte finish that’s perfect for a rustic look. And when you use chalk paint as the base for your project, it provides a nice primer on the tin can that allows you to use acrylic craft paint on your top layers.
How to Paint Tin Cans
The first step to creating this easy craft project is to prepare your cans for painting. Start by peeling off as much of the paper label as you can, then wash the inside and outside of the can with warm soapy water.
If there is still residue from the label on the can, fill your sink with warm, soapy water and allow the can to soak in the water for a few minutes. Use an abrasive sponge or steel wool to scrub away the leftover residue.
Dry the cans completely, then add your first coat of chalk paint to the cans. Two to three coats of chalk paint creates a solid base coat on your cans that you can use as the white part of your patriotic designs.
Patriotic Tin Cans
When you’re satisfied with the thickness of the chalk paint, it’s time to start decorating!
To make your striped can, use masking tape to mark of the white stripes on the can. Press each strip of masking tape onto the can to secure it in place. Then, grab your second can and start decorating with star stickers.
Any type of sticker works for this project. Just make sure you press the stickers firmly in place to prevent paint from bleeding under the stickers.
After decorating your cans, you can start painting them with acrylic craft paint. To stay with the rustic look, choose matte paint in red and blue. Paint the red stripes onto the can with masking tape by painting over the exposed white parts of the can. To create the star can, simply paint the entire can blue, covering the star stickers as you paint. Continue adding coats of paint until you’re satisfied with the coverage of each color.
When the paint has dried, carefully remove the masking tape and star stickers from each can. If you notice the paint has bled under the tape or stickers, use a small paint brush to touch up areas with your white chalk paint.
Decorating with Painted Cans
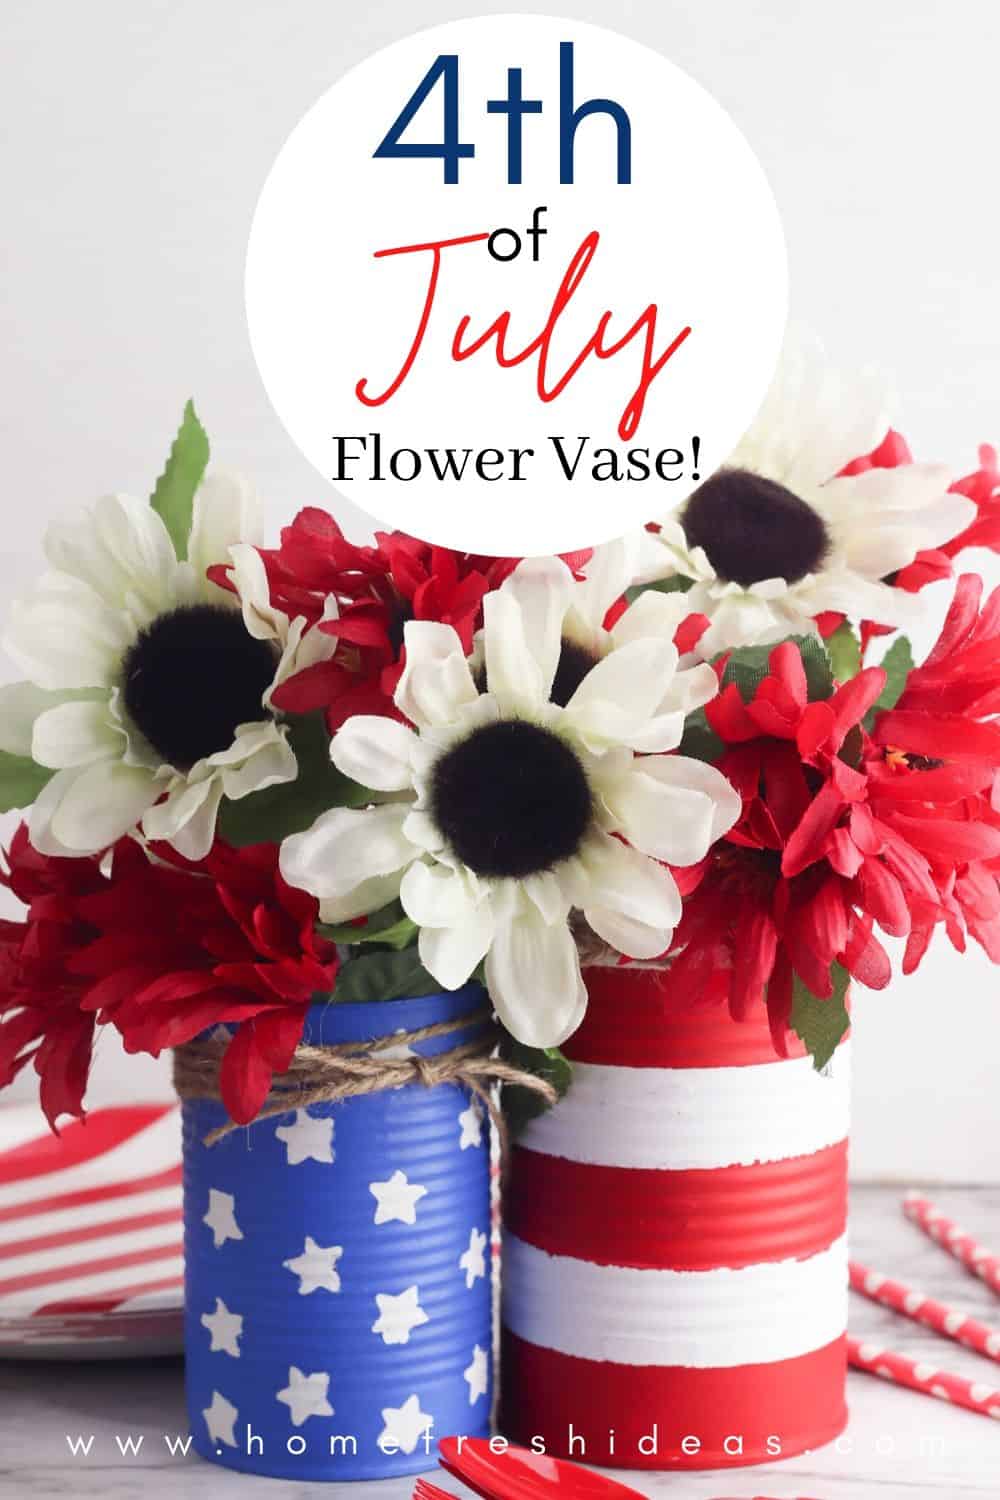
There are so many great ways to use your painted tin cans for decorating! To create rustic patriotic centerpiece, start by tying a bow around the top of each can with twine. Then add some flowers to the cans. To use fresh flowers, fill the cans halfway full of water and place the flowers inside. Or decorate the cans with faux flowers by placing some floral foam in the bottom of each can to help hold the floral stems in place inside the cans.
You can even turn your painted cans into planters! Fill the cans with potting soil, then plant your favorite flowers or succulents inside. Place them in a spot that won’t receive direct rain, since the cans don’t have proper drainage. Instead, make sure to water your flowers lightly each day to keep from washing them out with too much water.
Supplies Needed To Make This Flower Vase:
- 2 empty tin cans, labels removed
- Patriotic paint, red, white, and blue
- Masking tape
- Star stickers
- Twine
- Artificial or fresh flowers
Instructions:
- Paint both of the tin cans with the white chalk or spray paint. Then allow them to dry all the way before going to the next step.
- Create stripes using the masking tape on one of the cans. Paint the area that is exposed red. Remove the tape once the red paint has dried you can remove the masking tape.
- Add the star stickers on the second tin can. Then add paint over the entire surface of the can with blue paint. Take off the star stickers once the blue paint is completely dry.
- Add a bow to the top of each tin can with twine.
- Fill each of the cans with artificial or fresh flowers and place on your table as a centerpiece.

More Summer Ideas For You
Summer is in full swing, so it’s time enjoy it even more. Here are a few other summer ideas you are going to want to check out.
- Slushy Pineapple Rum Drink Recipe – This easy recipe is a MUST-HAVE at all your summer parties. It’s incredible
- Easy DIY Herb Garden Planter Idea – Grow your own herbs and enjoy them for all meals!
- Boozy Strawberry Watermelon Drink Recipe – Enjoy a few of these boozy drinks and you are sure to love them.
- Easy Wooden Tic Tac Toe Game – Great for outdoors or indoor events. Kids go wild for these.