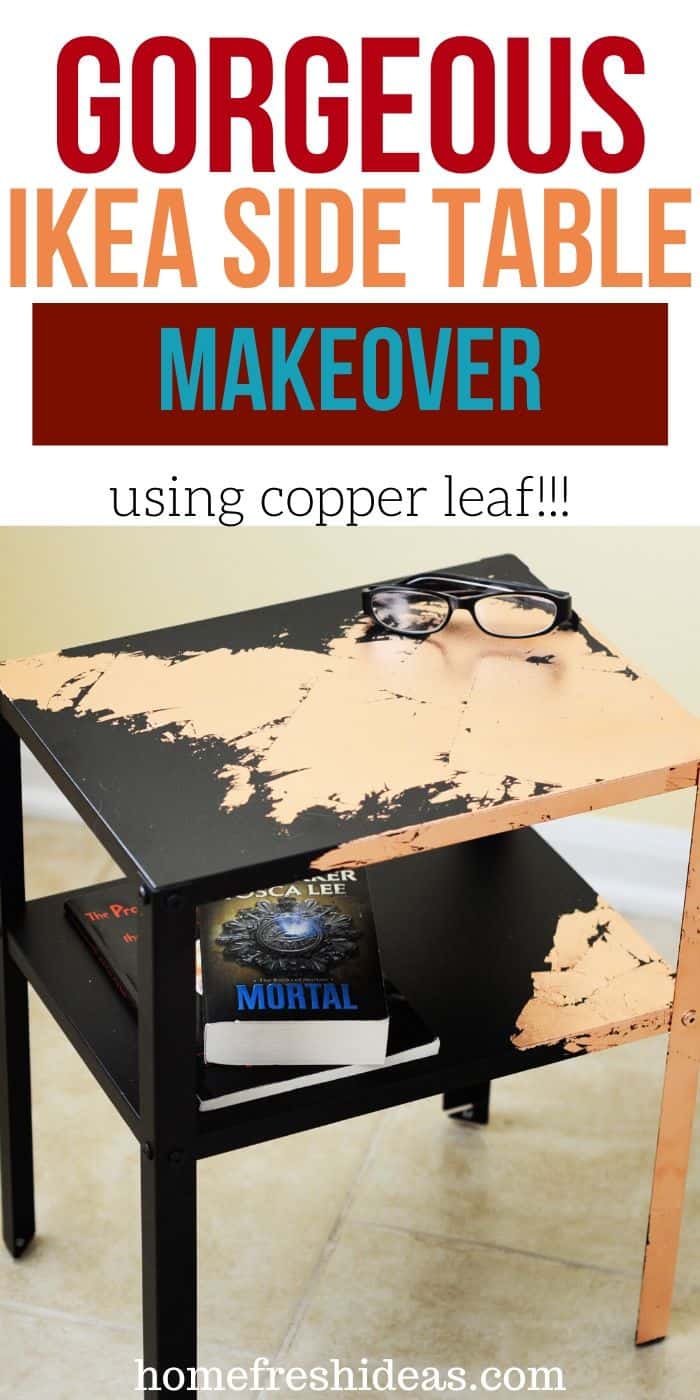
You guys! I can’t even begin to tell you how excited I am to share this IKEA Side Table Furniture Makeover! Granted, there is nothing wrong with the IKEA nightstand to begin with, but I wanted to add some major character and pizzazz. I think it turned out awesome and I’m pretty sure you will agree.
Gorgeous IKEA Side Table Furniture Makeover
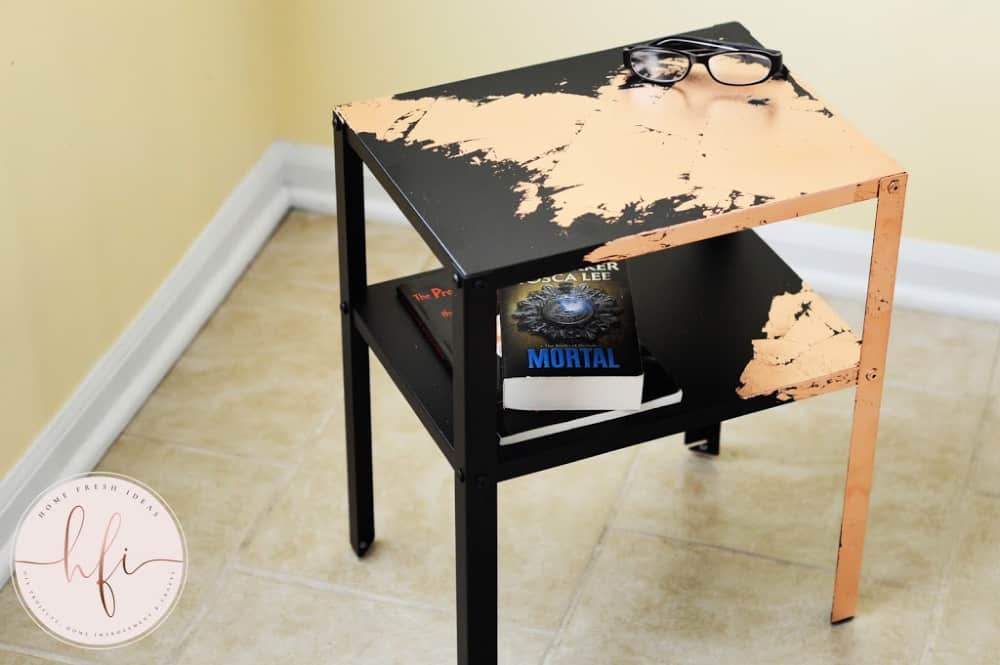
While I used an IKEA KNARREVIK Nightstand when working on this furniture makeover. However, I love this project so much because you can complete this look on various pieces of furniture.
Maybe you have something in your attic or find a great deal at a yard sale on a table you can’t pass up. Either way, you can give it a facelift without breaking your budget.
Another fun thing to do is if you update furniture and don’t have room for all the pieces, you can easily sell them. People can’t get enough of unique and fun furniture. Set up a booth at a craft show or sell items on Facebook Marketplace!
Materials Needed For IKEA Small Table Makeover
- IKEA KNARREVIK Nightstand or any other table you want or have on hand.
- 10 Copper Leaf Foil Sheets
- Size Adhesive
- Small Paint Brush
- Large Soft Makeup or Gilding Brush
How To Small Nightstand A Makeover
Whether you are refinishing a coffee table, side table, or even a chair the directions are going to be the same. Once you get the hang of how to update the IKEA side table you can hit your local thrift store for all sorts of bedside tables and other projects to work on.
Set up your table as the IKEA directions state.
Dust down the table before beginning.
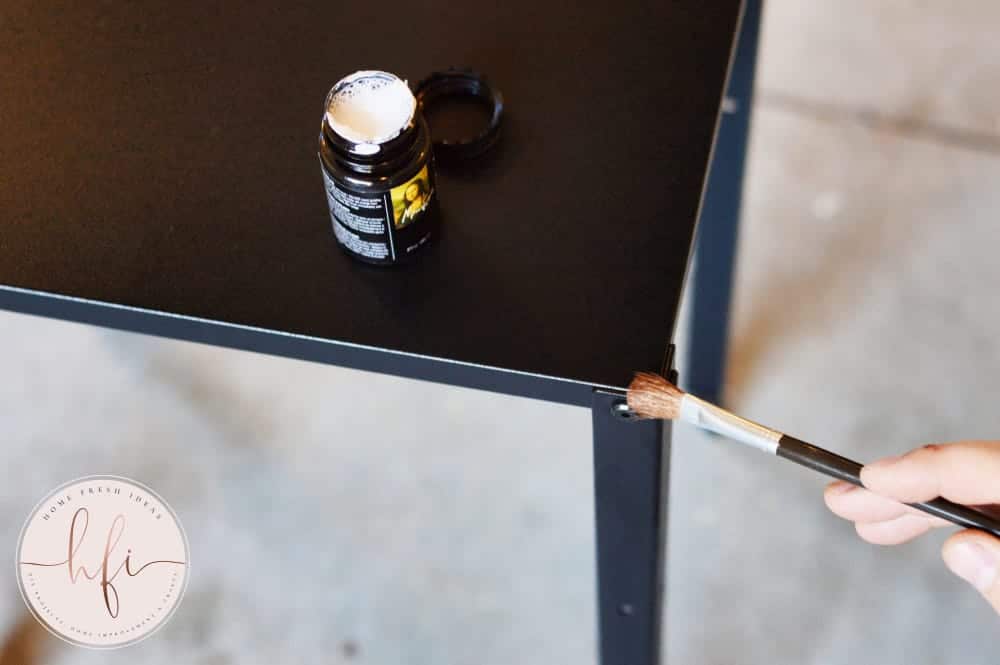
Give the adhesive a quick shake before opening. It will be bubbly and very thin. A lot goes a long way. Using the small paintbrush, apply the adhesive starting with the back left corner, going to the right front corner of the table in big, swishy strokes.
Keep coating down the front right leg all the way to the floor. You’ll also want to coat the edges of the top of the table (both edges leading from the top right corner) and the front right corner of the second shelf.
Remember, you don’t want it to be perfect, gilding is about making something look crackly, so the adhesive can be imperfect.
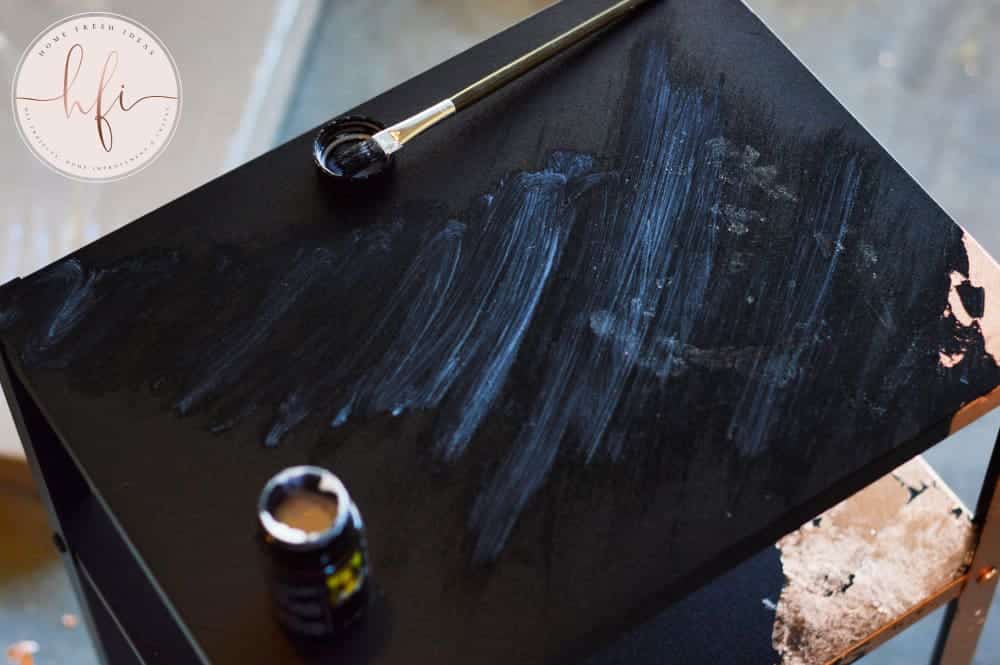
The adhesive will dry within 5 minutes or less and turn clear when it’s ready. It stays tacky for around 48 hours which means you can apply the foil sheets up until it’s no longer tacky.
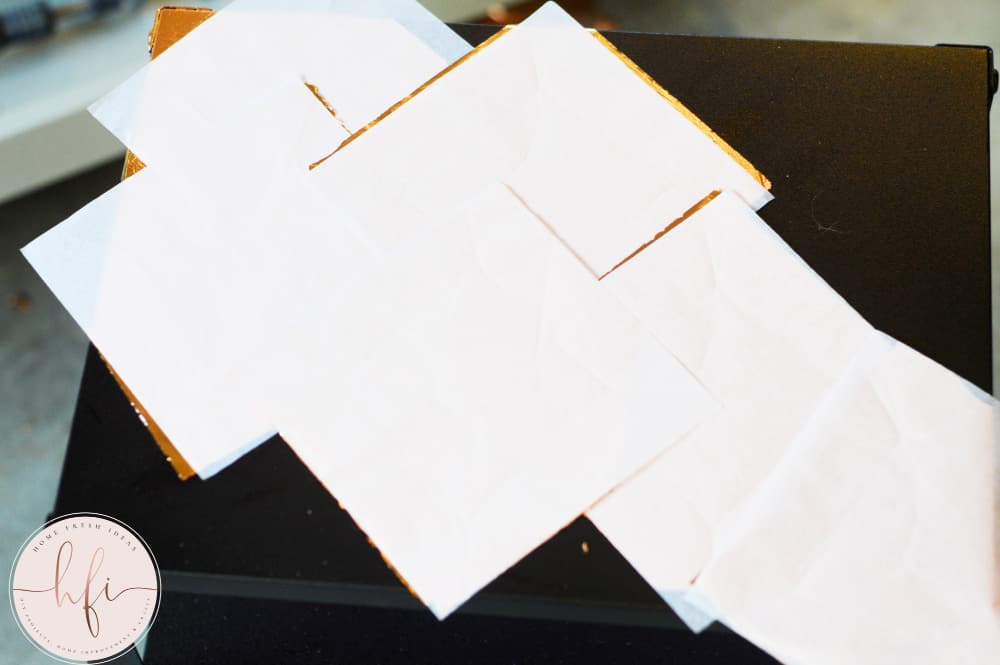
Gently remove one piece of the copper leaf at a time, keeping the thin paper over the top of it. Place the leaf on top of the portions of the table where the adhesive was applied, the copper portion facing down, the thin paper facing up. Cover all the spots where adhesive might be.
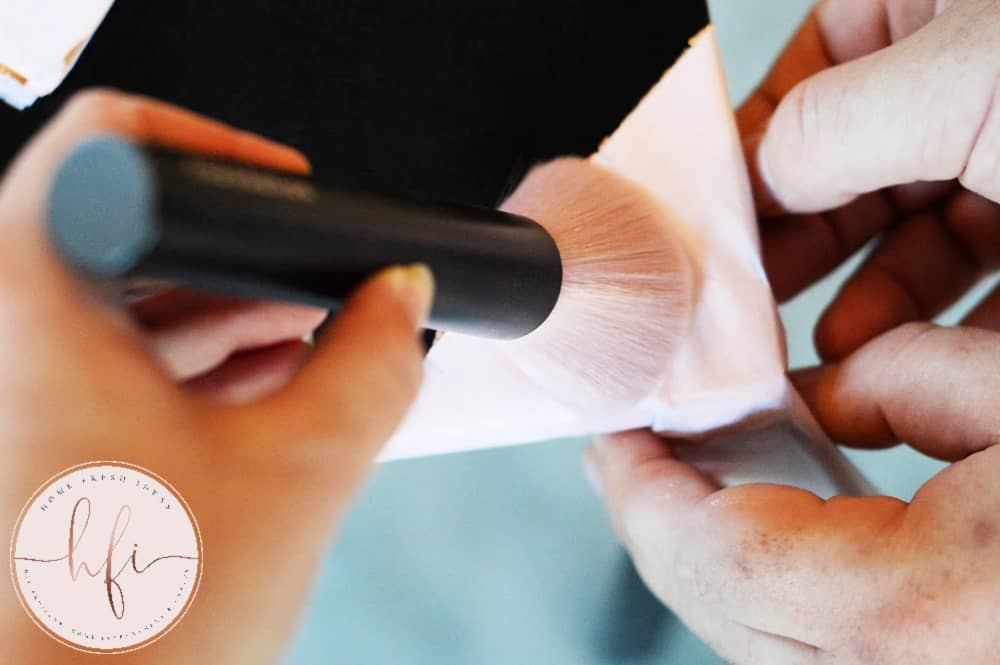
Use the soft brush to gently press down on the leaves as you apply them. Once all are applied, use more pressure on the brush and go over all of them, making sure they’re applied well. Not all portions of the leaves will stick and they’re not meant to. I like to use my hand to press down on the leaves before removing the thin pieces of paper.
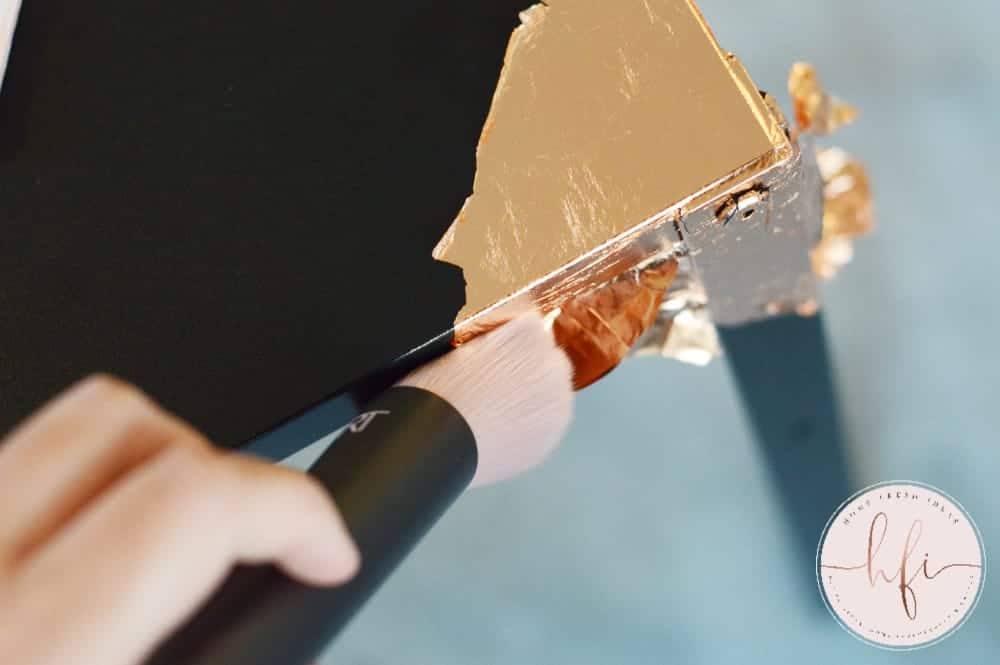
Using the large brush, begin brushing at the copper leaves, effectively removing any excess. Do this for a couple of minutes until there are no random unstuck pieces.
Dust off the table and reapply adhesive and copper leaf to any areas that didn’t get covered that you wanted to be covered.
NOTE:
If you would like to make the table white with this beautiful gold accent, simply use a white metal paint. Spray paint would even do the trick. Be sure to do at least 2 coats, more if the paint is cheaper and doesn’t cover well. Give it a few hours to dry thoroughly before following the steps above.
Can you believe how easy it is to give this IKEA side table a furniture makeover? It turned out so beautiful and I know that you can quickly replicate this process too.
More DIY Projects & Ideas
Check out these ideas for decorating or working on projects. Your home will go from ordinary to extraordinary in no time!
- The Best Fake Houseplants For People With Black Thumbs
- Gorgeous & Easy DIY Wreath You Can Make In Less Than 1 Hour
- DIY Bathroom Farmhouse Wooden Sign
- Must-See Tips Before Working With Pallet Wood
Top Decorating Ideas That Are Hot Right Now
If you are looking for items to decorate your home that are already done, these are for you! They are ready to add to your space and would go beautifully with your new IKEA side table.